Most brake and gear problems come down to three things: cable tension, pad position, or a limit screw that has drifted. None of these require special tools or a trip to the bike shop — a couple of Allen keys, a Phillips screwdriver, and about 20 minutes is enough for the majority of adjustments.
This guide covers rim brakes and indexed derailleur gears, which are standard on most hybrid and commuter bikes. Mechanical disc brakes follow the same cable-tension logic. Hydraulic discs are a different matter: if they feel spongy, they likely need bleeding and that’s a workshop job.
Tools You’ll Need
- 5mm and 4mm Allen keys (hex keys)
- Phillips screwdriver (for limit screws on most derailleurs)
- A thin piece of card or a business card (for toe-in)
- A clean cloth
No torque wrench needed for basic adjustment. If you’re replacing cables, the pinch bolt on most Shimano brakes should reach around 6–8 Nm — hand-firm plus a quarter-turn is a reasonable guide.
How to Adjust Your Bike Brakes
Work through these steps in order. Each one builds on the last, so don’t jump ahead.
Step 1: Try the barrel adjuster first
The barrel adjuster is the cylindrical knob where the cable enters the brake lever or, on some brakes, at the caliper itself. It’s the quickest fix for a lever that pulls too far before the brake bites.
Turn it anti-clockwise (away from the cable stop) to add tension. This brings the pads closer to the rim so the brake engages earlier in the lever stroke. Make a quarter-turn, squeeze the lever, and check the feel. Repeat until the brake bites firmly when the lever is roughly a finger’s width from the handlebar.
If the barrel adjuster is already fully extended and the lever still pulls too close to the bar, you need to re-set the cable at the pinch bolt (see step 4).
Step 2: Centre the caliper
If one pad rubs the rim while the other sits well clear, the caliper is off-centre. The fix is usually straightforward: squeeze the brake lever fully and hold it, then tighten the caliper’s mounting bolt while the lever is held in. Release the lever. This method self-centres the caliper against the rim.
If a pad still rubs, look for a small centring screw on the top of the caliper — usually a 2.5mm hex. Small adjustments move the caliper left or right. Turn no more than a quarter-turn at a time.
Step 3: Check brake pad alignment and fix squealing
The pad must strike the rim cleanly across its full face — no higher than 1mm from the tyre sidewall, and definitely not touching the tyre. Loosen the pad fixing bolt, set the position, and re-tighten.
For squealing brakes, try a small amount of toe-in. This means the front edge of the pad contacts the rim a fraction before the rear edge, which stops the brake vibrating under load. To set it: slip a thin piece of card (roughly 1mm thick) behind the rear edge of the pad, hold the pad against the rim, and tighten the fixing bolt. Remove the card. The difference is subtle — barely half a millimetre — but it resolves squealing in most cases.
Step 4: Re-set the cable if the barrel adjuster is maxed out
Wind the barrel adjuster fully back in clockwise first (so you have room to fine-tune afterwards). Then undo the pinch bolt on the caliper. Pull the inner cable taut with a pair of pliers until there is roughly 1.5–2mm of clearance between each pad and the rim. Re-tighten the pinch bolt, then use the barrel adjuster to fine-tune from there.
⚠️ Safety check: after any brake work, squeeze each lever hard while stationary before riding. The lever must not reach the handlebar, and the wheel should lock immediately. If anything feels spongy or uncertain, identify the cause before riding.
How to Adjust Your Bike Gears
Gears that skip, refuse to reach certain cogs, or grind are nearly always a cable tension or limit screw problem. Work through this sequence.
Step 1: Check the derailleur hanger
Crouch behind the bike and look at the rear derailleur straight on from behind. It should hang vertically, parallel to the wheel. If it angles noticeably inward or outward, the hanger — the small replaceable tab it bolts to — is bent. A bent hanger means no other adjustment will hold. Get it straightened at a bike shop before continuing; most shops will do this for a few pounds.
Step 2: Set the high (H) limit screw
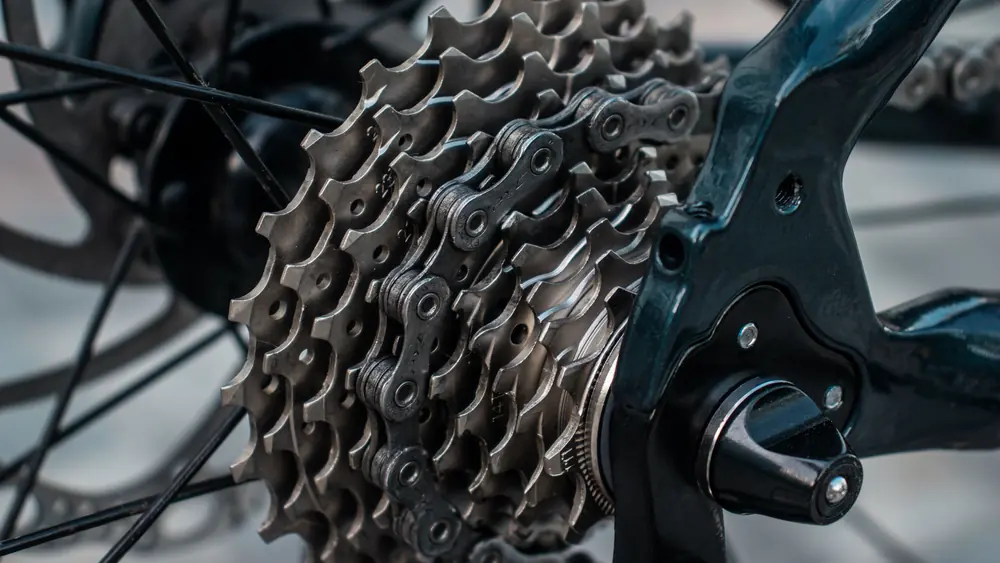
Shift the chain to the smallest rear cog (hardest gear). Look at the upper guide pulley from behind — it should sit directly in line below the smallest cog. If it’s off, adjust the H screw, which is usually marked on the derailleur body. Turning it clockwise restricts outward travel; anti-clockwise allows more. Dial it until the pulley aligns with the cog.
Step 3: Set cable tension with the barrel adjuster
Staying in the smallest cog, click the shifter once toward the larger cogs. If the chain doesn’t move, add cable tension by turning the barrel adjuster (on the shifter or at the cable stop on the frame) anti-clockwise a quarter-turn, then try again. Keep adding tension in quarter-turns until each click produces a prompt, clean shift up the cassette.
If the chain overshoots and rattles against the next cog up, you have too much tension: turn the adjuster clockwise a quarter-turn. The goal is one click equals one cog, consistently across the whole cassette.
Step 4: Set the low (L) limit screw
Shift to the largest rear cog (easiest gear). The upper pulley should sit directly below that cog. If the chain won’t reach it, loosen the L screw slightly (anti-clockwise). If the chain wants to go past the cog toward the spokes, tighten the L screw (clockwise) until it stops there.
Err on the side of slightly too tight rather than too loose. A chain thrown into the spokes under load can lock the wheel.
Step 5: B-tension if the chain skips on the largest cog
The B-tension screw sits at the top of the derailleur body, near the hanger bolt. It controls the gap between the upper pulley and the cassette. If the chain skips or the derailleur rubs on the largest cog, increase B-tension by turning the screw clockwise. The upper pulley should clear the top of the largest cog by around 5–6mm with the chain on that cog.
Keeping Everything in Check
Cables stretch gradually, so both brakes and gears tend to drift slowly rather than fail suddenly. A quick monthly check — squeeze the levers hard, run through all the gears — catches small problems before they become bigger ones. If you’re already spending a few minutes each week on the basics, the 20-minute maintenance routine covers this alongside chain lubing and tyre pressure.
If a cable is frayed at the end or at the pinch bolt, replace it before the next ride. Frayed brake cables can snap without warning. Replacement inner cables cost a few pounds at most bike shops and take around 15 minutes to fit once you’ve done it once.
For puncture repairs on the road — the other skill every commuter needs — see the step-by-step guide to fixing a puncture.
When to Skip the DIY and Book the Bike In
- Hydraulic disc brakes feel spongy: they need bleeding, which involves brake fluid — a workshop job for most people.
- The derailleur hanger is visibly bent: straightening without an alignment tool usually makes it worse, not better.
- Inner cables are frayed or kinked: replace them; frayed brake cables are a safety hazard.
- The derailleur body itself is bent: bending it back rarely gives a lasting result.
- You’re not confident about the brakes: if anything about the stopping power feels wrong after adjustment, get a second opinion before riding.
Frequently Asked Questions
How do I know if my bike brakes need adjusting?
The two main signs are: the lever pulls close to the handlebar before the wheel stops, or the pads rub the rim even when you’re not braking. Both are fixable at home in most cases using the barrel adjuster or by re-positioning the caliper.
What does the barrel adjuster do?
The barrel adjuster controls cable tension. Turning it anti-clockwise (out) adds tension, pulling brake pads closer to the rim or shifting the derailleur toward larger cogs. Turning it clockwise (in) reduces tension. Make quarter-turn adjustments and test each time.
What are the H and L screws on a derailleur?
They set the physical limits of derailleur travel. The H (high) screw stops the chain going beyond the smallest cog. The L (low) screw stops the chain going past the largest cog toward the spokes. If either is too loose, the chain can drop off the cassette or go into the frame.
When should I take my bike to a mechanic?
If hydraulic disc brakes feel spongy (they need bleeding), if the derailleur hanger is visibly bent, or if a brake cable is frayed, a mechanic will sort it more safely. Brakes are safety-critical: if in doubt, get them checked before your next ride.